
Are you a fitness enthusiast? Or you have the desire to stay in shape? Then you may want to consider having your pull-up bar at home to help you keep fit and maintain a solid form.
Having a pull-up bar outside your house guarantees, you keep fit at home without the effort needed to go to the gym. A DIY pull-up bar is not just easy to set up; it is also very affordable as it is something you can set up yourself with proper guidance.
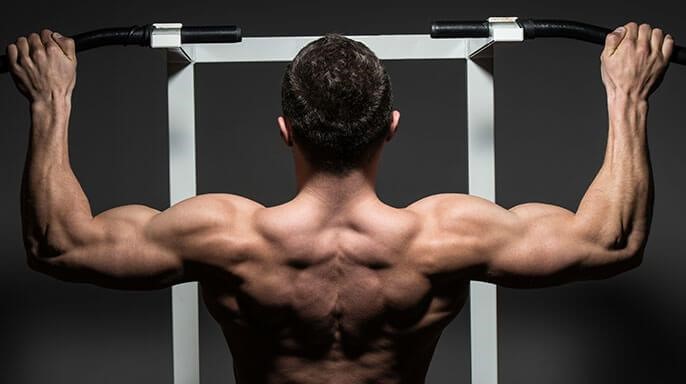
A pull-up bar is an exercise tool that strengthens your upper body, including your hands, shoulders, back, and chest. It helps work on your muscle. Regular Pull-ups are only one of the many effective strength training exercises. To explore more effective ways to improve your fitness journey, visit thecodyallen.com.
In this article, you will learn how to build a pull-up bar outside your house, the materials, tools/equipment you need, and the requirements needed.
Essential Requirements for Building a Pull-up Bar
You need to consider some essential requirements when you plan to set up a pull-up bar outside. This will help you ensure the stability and durability of your pull up bar while you exercise.
Size and Space
To enjoy effective exercise, you need to determine the exact size and space you need to build your pull up bar that will allow a variety of exercises such as pull-ups, muscle growth, leg raises, chest raising, etc. Eliminating all obstructions will ensure there is no accidents during workout sessions.
The size and space should allow you to perform the different exercises without compromising on the techniques. You should ensure there is a minimum of 20″ (50cm) above the bar for adequate clearance. Also, fix the bar height high enough to hang freely with your feet above the floor.
Heavy-duty materials
The materials and equipment used should be strong enough for at least one person to exercise conveniently.
Weatherproof
When building a pull-up bar for outside, it is important that you make use of high-quality weather-friendly materials. The materials you use can get damaged and will not stand the test of time when it doesn’t meet the weather conditions.
Tools Needed to Build a Pull-up Bar Outside
There are a couple of tools you will need since you are doing this yourself.
- Spade
- Skill Saw
- Paintbrush
- Drill and 9-10 mm drill bit
- Tape measure
- Bolts
- Long rod
- An extra pair of hands just in case
Materials Needed to Build a Pull-up Bar Outside
POSTS; The posts’ quality and length are two things you should consider when choosing your posts. Your height as the user will determine the length of the posts use. We recommend two 10 – 12 feet long posts.
BAR; A steel bar is required for an easy to build pull up bar. Its thickness should be at least 33mm. You also have the option of choosing if your body build is bigger.
POSTCRETE AND CONCRETE; 2 bags of postcrete and 5-10 bags of concrete will be required.
GRAVEL AND RED OXIDE PAINT; These are also needed for water drainage and prevents the posts from rotting.
How To Build A Pull-Up Bar Outside
When everything you need is ready and set, the next step is to build your pull up bar following the steps below.
Step 1: Adding Marks
The first step is to mark two points on the ground where you want to put the posts. Ensure that the distance between the two posts is at least 5 feet.
Step 2: Dig the holes
Dig two square holes of about 10 x 10 inches exactly in the middle of the place you marked earlier. The post length will determine how deep the spot you will dig will be.
Let’s say you want to use a post of 11 feet, then the depth of the hole can be around 3-4 feet so that the post does not get loose over some time.
Step 3: Add some gravel and fix the posts
Once you have dug up the holes successfully, pour about 3 inches of gravel in each hole. It helps with water drainage and to prevent the wood from getting rotten. The gravel also helps with water drainage.
Another way you can prevent the wood from rotting away is by painting the post with fence paint. You can then fix the posts in the holes you have dug for them. Ensure that the two posts are on the same level.
You need to pay proper attention to this part because the posts must be fixed straight up, and the bar is level on the top. You can get help to ensure that the positioning of the posts is accurate or use Spirit Level to confirm the posts’ positioning.
Step 4: Add some concrete and postcrete
You need to follow the instructions on the bag when adding postcrete and ensure that you set your mixture well. It takes less than 10 minutes for the postcrete to dry, so it is crucial that you add the correct amount of water and make sure the posts are level.
Follow these short steps to add the postcrete and concrete.
- Add the right amount of water to the postcrete and mix with either a rod or broom handle to mix the water into the powder.
- Ensure that the posts are on the same level while the postcrete dries, which is usually within 10 mins
- Also, ensure to follow the instruction on the bag for mixing concrete. Then fill up the holes and ensure they are level. This may take a day or sometimes two days to set.
Step 5: Set up the Bar
Since you’ve been able to fix the posts, it is time to mount the bar. With a measuring tape, you can measure the distance between the two posts. An accurate measurement is essential is for the steel merchant to cut the correct bar length for you.
Once you have your bar, follow these steps to fix it on top of the posts.
- Position the bar where you want it and ensure that it is level. Then mark holes for drilling.
- Drill about 3-4 inches where you’ve marked and ensure it’s the same length as the thread on the bolts.
- Then use a 9 mm drill bit with a 10 mm bolt.
- Use a spanner to fix the bar properly.
- You can also decide to weld the bar on the posts too.
Step 6: Add some finishing touches
You can paint your poles and bar with red oxide paint for better aesthetics and to prevent rot. It’s now time to enjoy your hard work.
Wrap Up
Now that you have all the information you need to build a pull-up bar outside, you can start your bar project. With regular pull-ups and chin-ups, your upper body strength will eventually be improved.
Comments are closed.